How to Build a Patio Cover: A Step-by-Step Guide
If you’re dreaming of transforming your outdoor space into a cozy, shaded retreat, building a patio cover is a great place to start. Not only does it provide a comfortable area to relax, but it also increases your home’s value and creates a beautiful transition between your indoor and outdoor spaces.
10/8/20244 min read


In this article, I will guide you through building a patio cover-from planning right through to completion-either you're a DIYer or just want to make your backyard more livable. This step-by-step guide will be taking you through everything you need to know.
Step 1: Planning and Design
Before reaching for your tool kit, the place to start is with a good plan. The first thing you need to do is answer these questions:
What will be your patio cover used for? For shade, for sheltering from the rain, or purely decorative?
How big does the cover need to be? Consider your patio size and the amount of people you'd want to fit underneath.
What materials are you going to use? The standard ones include woods, metals, and composites. Wood is beautiful and sturdy; metal can give it that sleek modern look.
Do you need a building permit? Check with your local building authority and find out whether a permit will be necessary for the structure.
Time Needed: It depends on the place and difficulty of the project, but planning, as well as gathering materials, takes approximately 1-2 weeks.
Step 2: Gather Materials and Tools
After your design has been finalized, it's now time to gather materials. Here is some of the things you may need:
Pressure-treated lumber if using wood
Cement to set the posts
Metal brackets and screws
Roofing material, either shingles or polycarbonate panels
Drill, saw, measuring tape, level, and hammer
Paint or wood sealer, as the case requires
Time Needed: 1-2 days spent shopping for and collecting all materials.
Step 3: Prepare the Site
Clear the area in which the patio cover is going to be built. This might involve removing furniture, plants and other preexisting structures if needed. Check whether the ground is at level.
If you do not have a patio, you will be laying your foundation first with either concrete, paving stones, or wood decking. The important thing is to make sure the base is laid level and securely in place before you build the cover.
Time Needed: You can clear and prepare the site in 1-2 days depending on the size of the area.
Step 4: Set the Posts
The posts are vertical supports that will bear the patio cover, so setting these securely is very important. First of all, measure and mark where each post will go. There could normally be 4 to 6 posts, depending on the size of a patio cover.
Dig holes for each post about 2 feet deep. Place the posts in the holes with cement in them. Make sure the posts are completely level. Allow the concrete to cure for a minimum of 24 hours.
Time Needed: This will take about 1 day of digging and setting the posts. Add another 24 hours to allow the cement to set.
Step 5: Frame
Now that the posts are set in concrete, it is time to attach the beams and rafters that comprise the structure of the patio cover. First, screw on horizontal beams into the tops of the posts. The rafters will attach to these; they are the slats that comprise the roof.
Everything should be level and evenly spaced, and beams should be securely fastened using metal brackets or screws. If you add a sloped roof, this is the stage you will attach the rafters at an angle to accommodate water drainage.
Time Needed: Framing and securing the beams with screws will take roughly 1-2 days, depending on the design difficulty.
Step 6: Install the Roof
Now that the frame is complete, it's time to install the roof. In the case of a simple pergola-style patio cover, you'll merely be placing slats across the top of the frame. For the installation of a solid roof, you will still attach plywood or polycarbonate panels and add shingles or other roofing materials.
Seal the roofing materials from rain and any other elements safely if you'd want to make the roof fully waterproof.
Time Required: Roof installation depends on the nature of your chosen roof; this may take about 1-2 days.
Step 7: Finishing Touches
Once the structure is up, then you can work on its finishes. Sand rough edges, paint or apply a coating of wood sealer to the wood for weather protection, and double-check that all screws and brackets are in place and tightened.
More decorative touches can be added, such as hanging lights, curtains, or outdoor furniture, to make your patio cover more attractive.
Time Needed: Finishing touches and painting/sealing will take about 1-2 days.
Estimated Total Time
Overall, constructing a patio cover will take about 1-2 weeks depending on how complex the design might be, the materials involved, and how much time you are able to put into it. Large project, but very worth your while!
Final Thoughts
Building a patio cover is a great addition to your outdoors and a way to extend both functionality and comfort for your family. With these steps, taking your time with planning and construction will have you enjoying your new patio cover for years to come.
Whether it be a cool retreat from the sun, an outdoor dining space, or only a place to sit and work, patio covers are a means of putting added value on a house with charm. Happy building!
Want to make your patio a cozy, stylish hangout?
Check out some awesome décor and furniture ideas to spruce up your outdoor space. From comfy chairs to cute lights and planters, you’ll find everything you need to make your patio the perfect spot to relax and unwind.
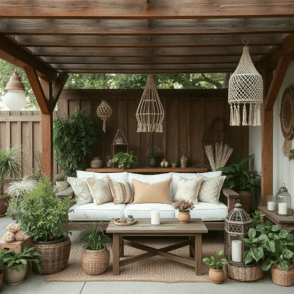
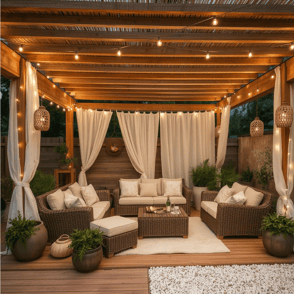
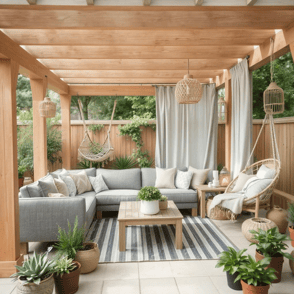
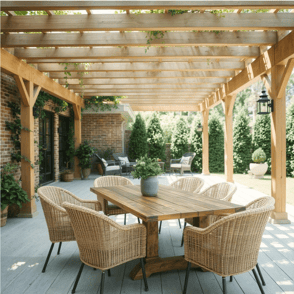
Get Inspired with These Patio Designs
Below, I’ve curated a selection of images showcasing different patio designs and creative ideas for adding a touch of personality to your outdoor space. Whether you’re looking to incorporate cozy lighting, lush greenery, or stylish planters, these photos will provide the inspiration you need to bring your dream patio to life.